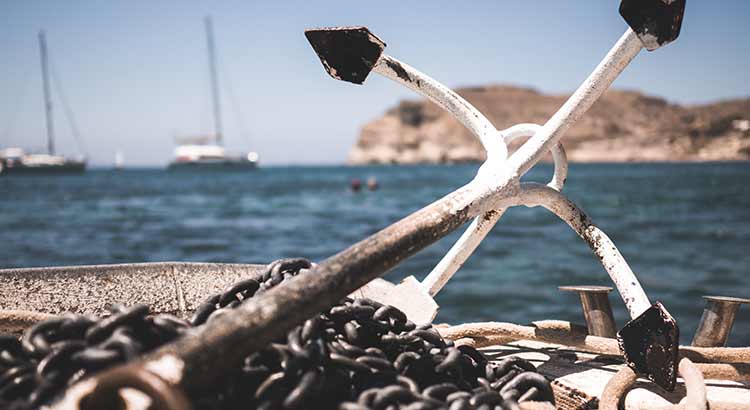
Learning how to anchor a boat is an essential skill for anybody who owns a boat. Even if you don’t plan on staying anchored too much, there will still come a time when you will have to drop the anchor into the water, and when you do it, you have to do it the correct way, otherwise you might end up sinking your boat.
The first time I sailed with a boat I asked a more experienced friend to come with me and teach me how to do it properly. To my surprise, the first thing he wanted to teach me when we got on the boat was how to anchor it. My friend also held boating safety classes, and he said that the most common mistakes people make are related to anchoring. So I decided to listen to the expert and follow his anchoring instructions.
After so many years have passed, I can happily say that I never had any problem with anchoring, and none of my boats sank. But I can’t stop seeing so many people around me making dangerous mistakes. So to make sure that nobody puts their lives, or their boats in danger due to bad anchoring I decided to write this simple step by step guide, that will teach you how to properly anchor your boat.
To anchor your boat correctly you have to:
- Secure your anchor
- Choose an area without obstacles
- Calculate the amount of line you will need
- Slowly lower the anchor
- Ensure that the boat is anchored
- Rise the anchor
After the guide we will also take a quick look at the different anchor types, since knowing what anchor to use is just as important as knowing how to use it correctly.
Table of Contents
Secure Your Anchor
A lot of people get the anchoring process wrong right from the very start.
A common mistake that people make is that they tie rope directly to the anchor. The correct way of securing an anchor is with a chain tied directly to the anchor, and then tying the rope to the chain.
Tying the rope directly to the anchor is the most inefficient thing that you can do. This is because the weight and length of the chain are the things that keep the angle of the rope and boat in a correct position. If you tie the anchor with a rope directly the angle will be completely off and the anchor won’t be able to stay correctly on the bottom.
Choose an Area Without Obstacles
The second step is quite simple, but essential. If there are other boats nearby they will make things harder for you, and they might end up getting too close to the anchor line and break it.
Underwater obstacles are a lot more troublesome than nearby boats. If you hit a really bad one your anchor might get stuck, and in some cases you might even have to abandon your anchor.
Knowing exactly what is at the bottom of the ocean can be quite hard without proper equipment. So it’s not easy to be 100% sure, but if you see any signs that suggest that there is something there, than better avoid that spot.
Calculate the Amount of Line You Will Need
The third step is to calculate the amount of line you will need, to do this you need to have a general idea of the water depth. In most cases you can get this information from somebody in the port, or with a simple search on Google.
After you know the depth, you will add the distance from the bow (the most forward part of a boat) of the boat to that amount. Then you will multiply that number by 5 or by 7.
Let’s look at an example to make things clearer.

If you are with your boat in a lake that has the water depth of 8 feet, and the distance between the surface of the water and the bow is 2 feet. We will add those two numbers up and obtain 10 feet. Now we will multiply that by 5 for this example. So we get 50 feet, that is the amount of boat lien that you will need in this situation.
As you can imagine, having 5 feet of line for 1 feet of depth will give your boat a little room to move around, so it won’t be completely stopped in one place when the water is calm. But if the weather is really windy, the wind will move your boat into one direction and the anchor will make sure that you won’t move from that spot.
But if your line is too short there is a big risk of thinking. If a really big wave is coming and the boat has no room to move than water will get into the boat.
On nice and calm days you can even use just 3 feet of line for each feet of depth, but if the weather is really bad you might want to increase the length of the line to 7 feet for each feet of depth. But in most situations 5 feet will be more than enough.
And make sure that you keep your rope in a nice coil, not mesley thrown all over the boat, or you could end up throwing yourself, or somebody else over the boat alongside the anchor.
Slowly Lower the Anchor
Now that you have a secure anchor, you are in a good spot, and you have the correct amount of rope, you can finally lower the anchor.
I’ve seen a lot of people grabbing the anchor with one hand and simply throwing it overboard. While this might look cool to some, it’s the worst possible way of doing things.
To lower the anchor correctly you first have to get to the bow of the boat, get as close to the side as possible, without falling over, grab the anchor with both hands, and then slowly lower it into the water, while watching your feet so that they are not caught by the rope.
If you were to simply throw it overboard, there is a good chance that you will hit your boat, which can lead to a lot more than a bad scratch.
After you are done lowering the anchor you should secure it to the cleat (a small metal piece that looks like a drawer handle, on the side of the boat).
Ensure That the Boat Is Anchored
At this point everything should be fine, but sometimes things that are out of our control can go bad. So it’s a good idea to know if your boat is really anchored, before you realize that you drifted too far from the shore.
After you lower the anchor, the line of the anchor should become very tight. And as soon as the line gets tight the nose of your boat will spin into the wind.
So if you drop the anchor and you notice that your boat is sliding too much, or the front of the boat is at a really strange angle, then something went wrong.
There are a lot of things that could have gone wrong. Maybe the anchor just didn’t manage to get a grip on the surface. Or the rope, or chain broke.
The only thing that you can do now is to get the anchor backup and lower it again.
Rise the Anchor
Raising the anchor is a lot more dangerous than lowering it, so you have to be extra careful. If you aren’t careful you can easily damage your boat, your back, or worse, take an unexpected dive.
The best thing that you can do when you rise the anchor is to let the boat help you. You don’t have to pull the whole length of the anchor by yourself.
Simply drive your boat to where the anchor is, or have somebody drive it and you can stay on the bow and give them indications.
When you are in a good spot grab the rope, then bend your knees slightly and hand over hand pull the rope. When you reach the chain pull very slowly, when you can reach the anchor with your hand do it, you don’t want to scratch your boat.
Extra tips
Now let me give you a couple of extra tips, and then discuss the different types of anchors.
Never tie the anchor to the stern of the boat. I’ve seen more than enough people tying their anchor to the stern of the boat, instead of the bow. This might not seem like such a bad thing but in reality it is extremely bad. The stern of the boat is under a lot more pressure than the bow and it’s a lot more susceptible to going under. This is one of the main reasons why small boats sing.
Always have a spare anchor with you. If you follow the guide above you shouldn’t have any problem anchoring your boat, but sometimes things that are out of our control can happen. And in the end you might end up losing your anchor. So try to always have a spare one with you, just in case.
Different Types of Anchors
Before I knew anything about boating I thought that all anchors look the same. But I quickly realized that’s not true. There are multiple types of anchors, and each one of them has its own advantages and disadvantages. So let’s take a quick look at each one of them.
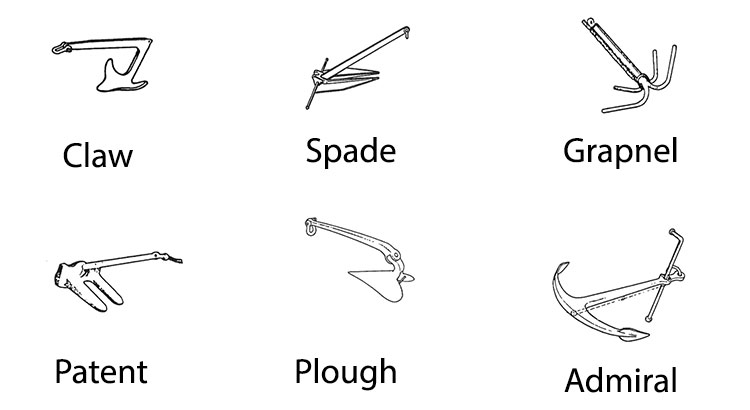
Claw: Very efficient anchor, it was initially used for oil rigs, the main disadvantage is that it can get quite expensive.
Spade: One of the best overall anchors, it has a good holding power and has no big disadvantage.
Grapnel: very useful for reef, but otherwise not very practical.
Patent: Overall a good anchor bud it doesn’t have as much holding power as the rest
Plough: Great holding power, but hard to stow.
Admiral: The classic anchor. It has a grat holding power but due to its shape it can be dangerous in shallow waters. Now it’s rarely used.
Final Thoughts
Now you should be able to anchor your boat correctly without any effort. Anchoring a boat is not hard, but it can be easy to do it the wrong way. And doing it the wrong way can harm you or others, as well as damage or sink your boat.
So make sure that you don’t try to hurry things up when you are anchoring and that you are as careful as possible.